Documents today are more than mere collections of independent data fields. They’re intricate webs where each piece of information is often linked, forming a cohesive story. Understanding this narrative is crucial, especially when dealing with complex documents like invoices, account statements, or delivery bills.
The fact that you can train your own extraction model on our platform is nothing new. From now on, however, you can also train precisely such complex document types and define precisely such relationships yourself. That’s where your expertise comes into play. You know your documents best, and with the right tools, you can craft an extraction model tailored perfectly to your needs. Let’s embark on this journey together!
The Challenge of Complex Documents
Imagine you’re handling an invoice. It’s not just about picking out random numbers or names. Each detail – the product description, its price, the taxes – they all belong to a unique story within that invoice. Recognizing these connections transforms a simple extraction into an insightful discovery.
Empowering You to Define Complexity
Our platform isn’t just about giving you tools; it’s about making you the architect of your data’s story. Now, you can delve into the world of complex documents, mapping out the intricate relationships that make your data unique.
Haven’t built a model before? Don’t worry! We’ll guide you through each step, and you can find all the foundational knowledge in
this blog post.
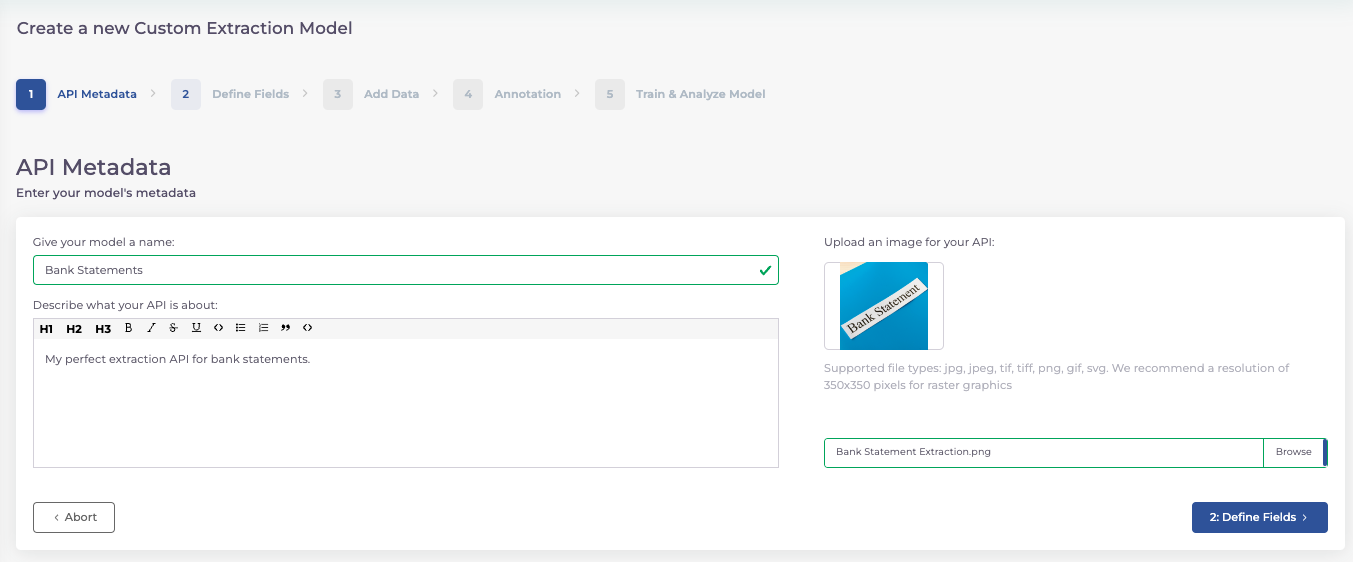
Step 1: Define Metadata
Your model is your masterpiece. Start by giving it a name, a description, and an image that resonates with its purpose. This is not just about identification; it’s about creating an identity for your model.
Step 2: Define Data Fields
This is where your data’s narrative begins to take shape. Choose between basic types (text, number, date, identifier) for individual fields and advanced types for groups of data fields.
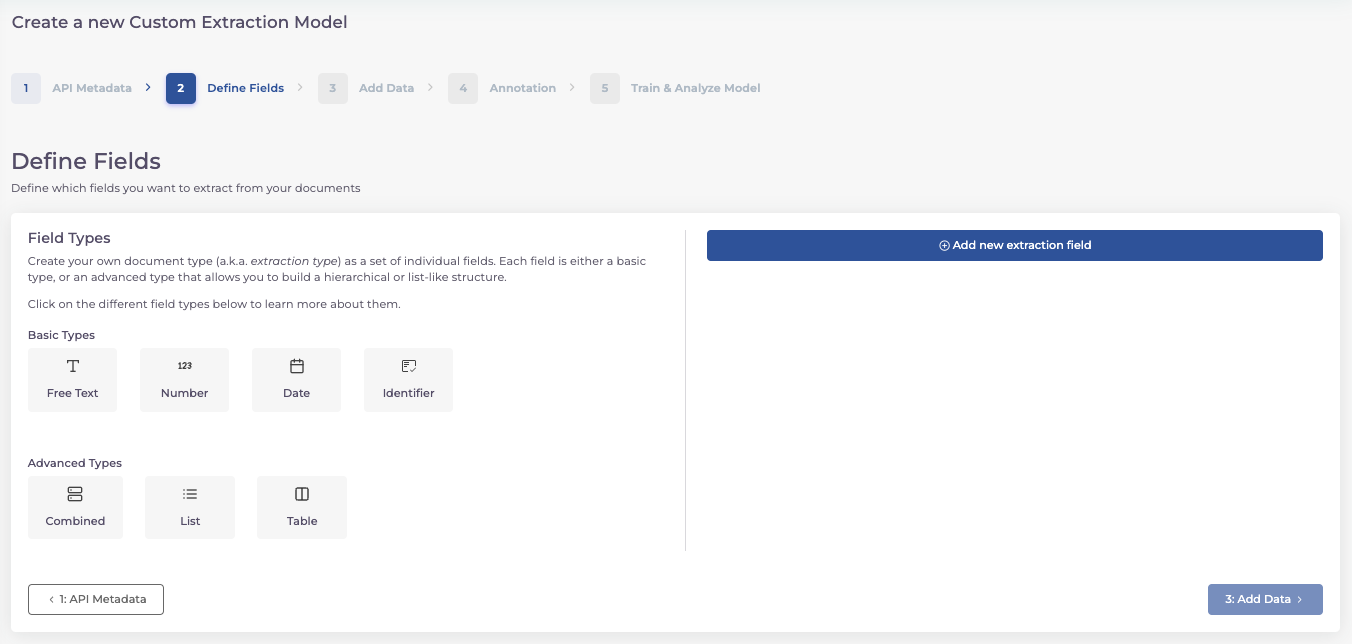
Basic Types
The basic types specify the type of data field. They therefore determine whether the content is a text (e.g. name), a number (e.g. age), a date (e.g. date of birth) or an identifier (e.g. IBAN). A basic type is therefore assigned to each individual field.
Advanced Types
Advanced types are groups of data fields. Each time you have a relationship or assignment of several data fields, you select one of the advanced types. You can then assign the corresponding data types, i.e. basic types, to this advanced type.
A. Combined:
Combined types are used for the hierarchical grouping of several fields. For example, you can define a combined type for the “Total amounts”, which provides one field each for the “Gross amount”, “Net amount”, “Tax amount” and “Tax rate”. All subfields in this example would be of the basic type “Number”.
B. List:
You can use a list to extract a list of elements instead of individual values. You can create a list of basic types (if you have several order numbers in your documents, for example) or a list of combined types (if you want to extract several bank details with IBAN and BIC each, for example).
C. Table
As the name suggests, a table groups the contents of tabular data. Articles are often displayed as several lines in a type of table. A table called “Article” would be created for these. The table then consists of the Combined Type, which consists of fields for the “Description”, “Quantity”, “Price”, etc. from Basic Types.
Note: In principle, you can also select a list of combined types instead of a table, as the two are equivalent.
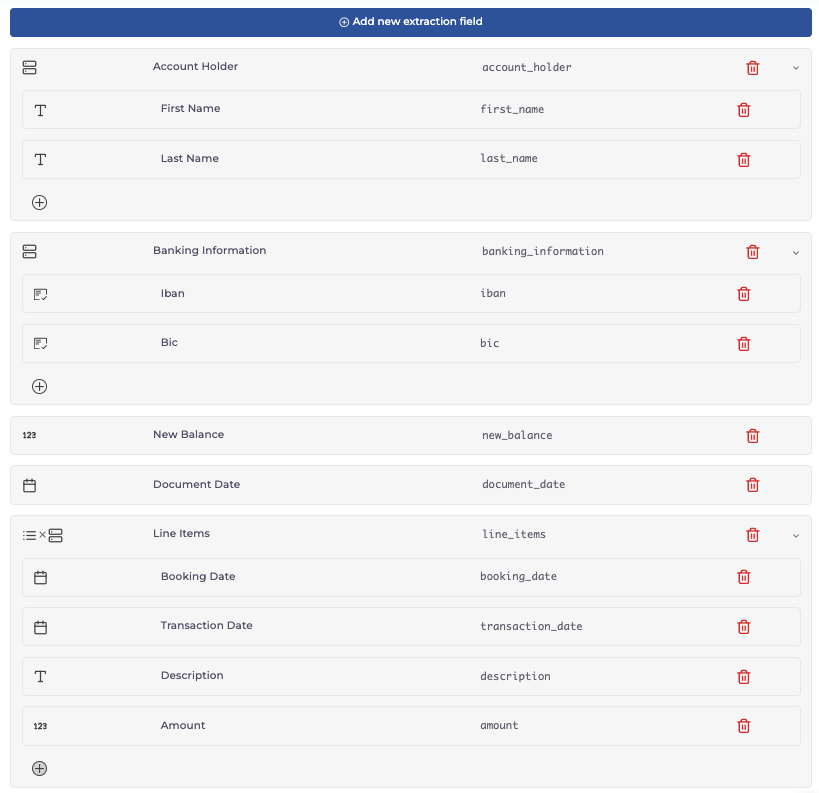
An Example: Bank Statement Extraction
Let’s say we’re extracting data from bank statements. To do this, we want to extract all information on the account holder, bank, account balance, date and booking details. It’s like piecing together a financial story, one transaction at a time.
Our defined data fields then look like this:
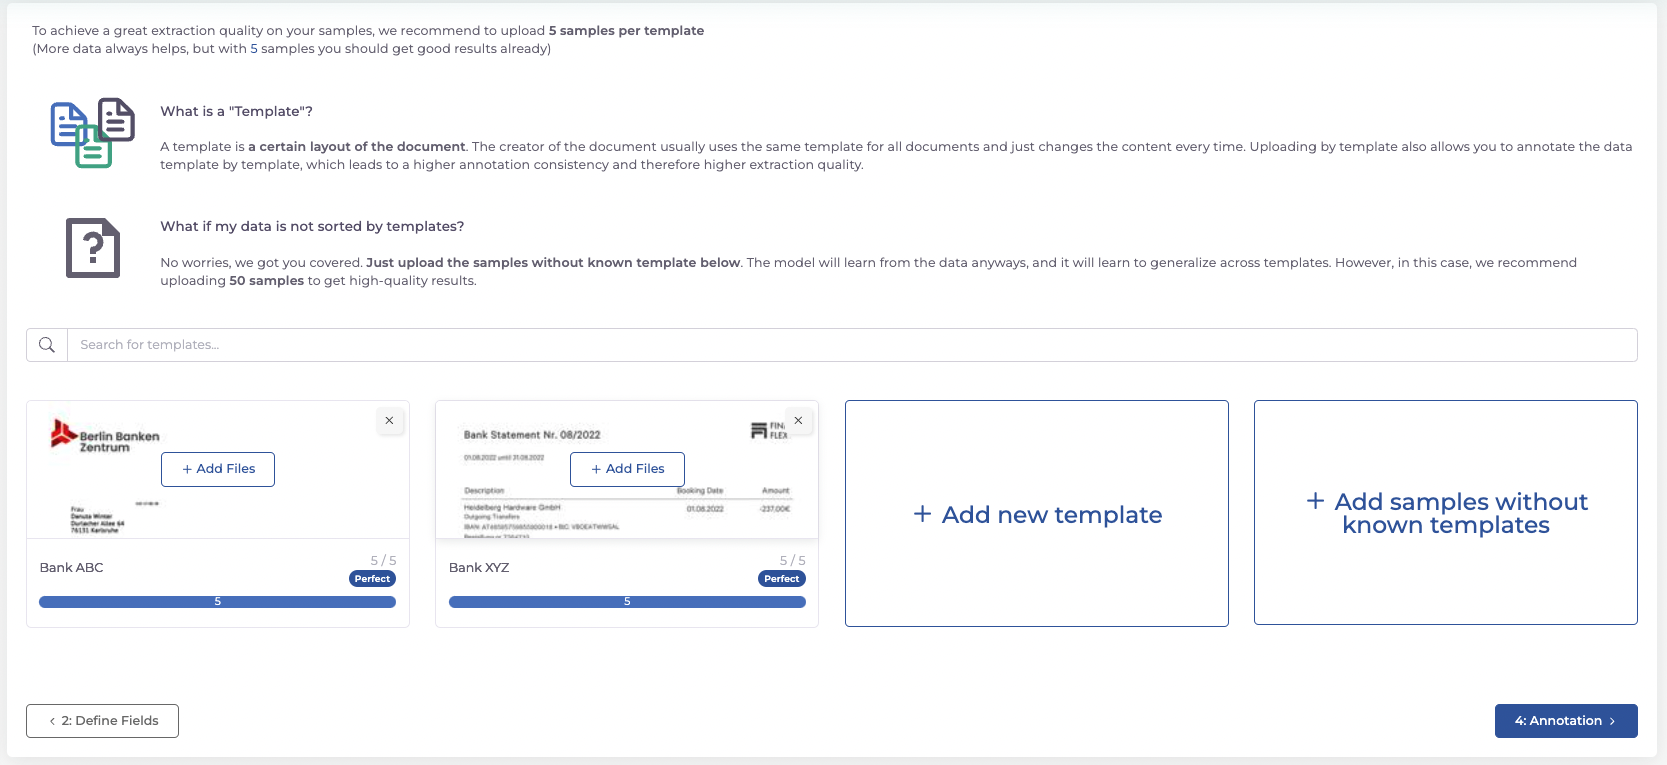
Step 3: Uploading Training Data
Your model is your masterpiece. Start by giving it a name, a description, and an image that resonates with its purpose. This is not just about identification; it’s about creating an identity for your model.
It is recommended that you upload at least five documents per template so that the AI can be sufficiently trained.
Step 4 : Annotate Your Documents
Here’s where precision matters. By annotating your documents, you’re teaching the AI to recognize and understand each data field. It’s a meticulous process, but remember, the quality of your model depends on the quality of this training.
The platform guides you through the uploaded documents template by template. To annotate, select a data field on the left and then the corresponding text boxes in the document. Once you have added all data fields to a category, you can then group them (the platform already suggests the grouping).
Once you have finished annotating the document, you can save it using the “Save and Next” button on the right-hand side of the toolbar and continue with the next document.
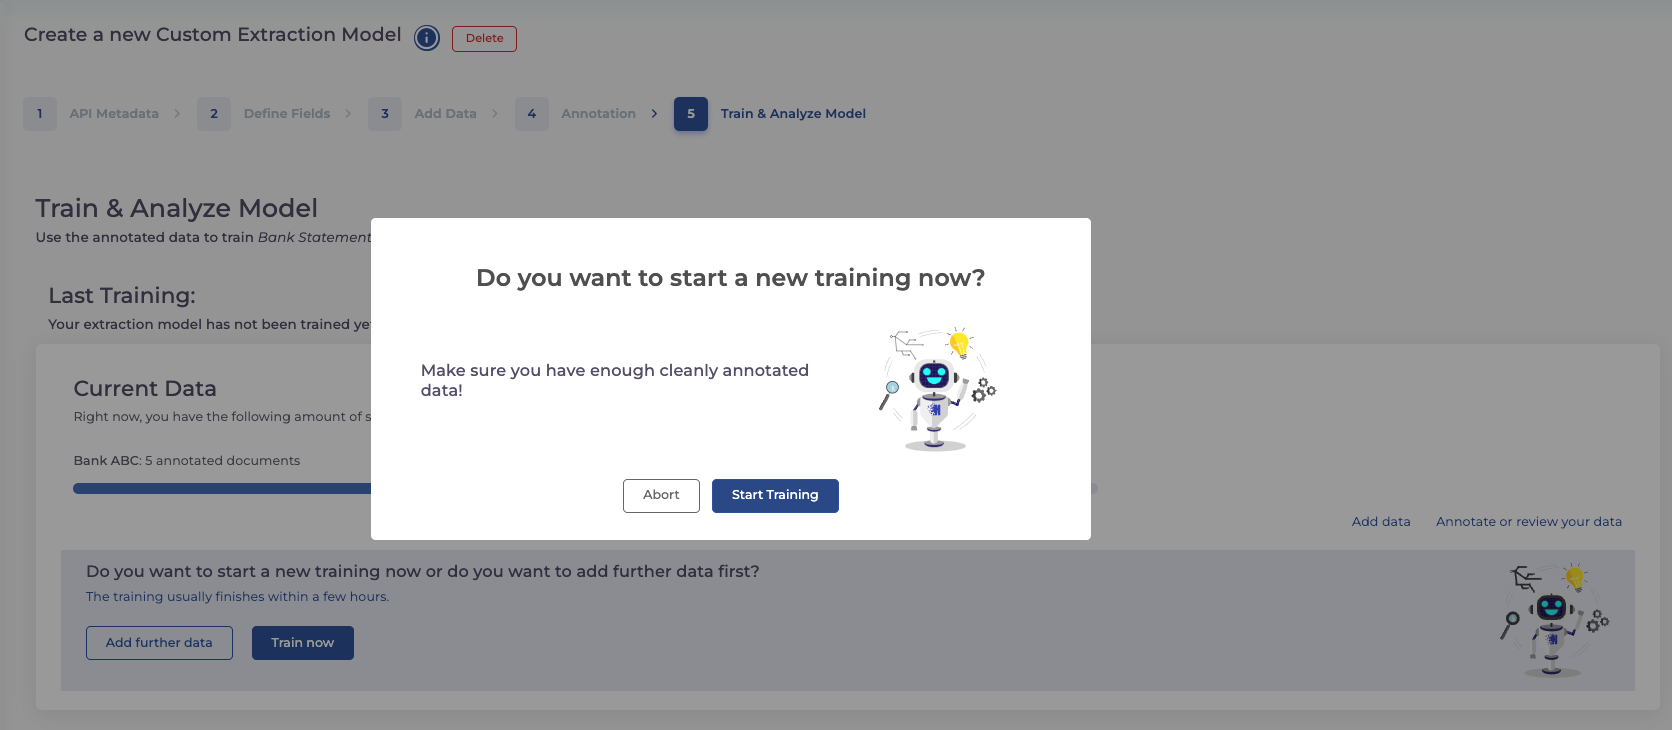
Step 5 : Start Your Training
With all documents annotated, it’s time to bring your model to life. Begin the training and watch as your extraction model evolves from a concept into a functional tool. You can already integrate your API until the training is complete. You can find all information on this and code snippets in the documentation.
Et voilà! and there you have it! Your custom extraction model is ready to dive into the depths of your documents, uncovering the stories hidden within.
If you encounter any mysteries along the way or need some expert advice, our team is just a message away.
Embark on this adventure, and let your data reveal its secrets!